04 September 2014

A New Mission Statement

This is the part where I don't have a completed project to show you today, so I'm going to babble at you for a little while instead.

I have some very bad habits, as far as sewing/making things in the SCA.  I do the same things in my mundane crafts, too.  I under-estimate the time I need for a project.  I forget how many things I have in the works at a time and get bogged down.  I have a hard time saying "no."  I feel overwhelmed when I take on too many things at once, react to that feeling by procrastinating, and then cram a project into the last few days before a deadline and completely stress myself out.  I put a lot of time and effort into making quality things for other people, then rush through things I make for myself, often resulting in sub-par clothing and accessories (or things that look fine on the outside, but, for example, don't have finished seams on the inside, or are devoid of fine details I'd put onto a garment for someone else).

I'm sure everyone reading this is nodding in agreement and empathy.  We all do it. I don't know an SCA crafter who doesn't do the same things.

In an effort to learn to set boundaries and to pace myself, so that I can turn out better-quality products all around, I've worked this whole year on creating new habits.  It started with finishing up all of the projects for others I had on the line at the beginning of the year, and then not taking on any new ones for several months. And then I set some rules for myself.  I've adhered to them all successfully, and it HAS made my life better.  It's also made it much easier to say to people, simply, "I have a lot on my plate right now, and can't accept, but ask me again in [time frame] and I might be available then."  My fear of turning people away aside, I've found that people really do understand that.

My Rules

  • Absolutely no more than two sewing projects for others at a time.  Limit three projects total (only two of which can be sewing).  
  • Establish expected delivery date before accepting project. 
  • Ditto project parameters. 
  • No procrastination:  (1) work on each project for at least two hours per week.  More if I want to, but minimum two hours. 
  • No procrastination: (2) as I have a habit as looking at commissions as "work" and things for myself as "play" - thereby making commissions feel like they're looming over me, I now allow myself to alternate working on a commission with working on something for myself, or around my home (the "fun" often as a reward for putting in a couple of hours on a commission when I didn't really want to). 
  • When I finish a project, I (a) clean up the entire craft room (or workshop), so that when I start the next project I'll have a clean space in which to work, and (b) often will lay out the materials for the next project as soon as the space is cleaned, so that when I walk in the next time, I see potential, instead of an empty room and a need to begin something. 

There's another rule, that I've recently come up with, and have been thinking a lot about lately.  I've been sewing since I was 9 years old, I've been costuming since I was 17, and have sewn for home decor since I was about 26.  As I mentioned before, I tend to put a lot of work and attention to detail into commissions, but not on projects for myself, which are often cheap, plain, and sometimes not completely finished.  You'd think, with all that experience, that every thing I make is just awesome, but it hardly ever is, by my standards.  You'd think I'd actually work up to my own standards, at least!  So then, my number one rule going forward, and my new sewing motto: 


Let every project surpass the previous. 

Which means: 
  • I will put the same attention to detail and quality into everything I make, not just things for which people are paying me. 
  • I will fine-tune my finishing skills on every project, and get better at it with every project. 
  • I would like to try to learn a new technique, or at least hone seldom-used ones with every project. 
  • My work now is pretty darn good, if I do say so myself.  A year from now, I want the things I'm sewing now to look like a beginner effort next to my progress to come.  

There is always something to learn.  You can always do better than you're already doing.   There is always opportunity to focus more, take more time, exercise more patience, and excel your own work at every step. 

And this goes for every craft, not just sewing; although my main thinking lately has been mostly concerned with sewing.  In the coming weeks I'll have a few new outfits to show you, some campsite decor type stuff, and even some nifty woodworking and artwork.  Hopefully each thing will be better than the last one I made. :) 


.

28 August 2014

They See Me Roman...

To go with the Roman outfits that my friend Simona and I worked on in August, I made some simple jewelry:


This is Simona's set, made of teal glass beads, cream-colored glass pearls, brass stamped fittings, and 22mm gold-colored copper wire.

The wire links in the necklace chain were made by me, as well, taking cues from both Ragnvaeig's wire link tutorial and from extant examples of Byzantine and Roman jewelry.


And this is the set I made for myself, using glass flower-shaped beads, green glass beads (which were too fake-looking a green color, so I donned a pair of gloves and smeared my palms with gold nail polish, then rubbed the beads between my hands - it toned down the color on the beads and made them look more handmade), natural freshwater pearls, and 22mm gold-colored copper wire.

Whee!


The centerpiece of the necklace is a pale green octohedral Fluorite crystal (which is the way most crystalline Fluorite grows), with one point broken off - which makes it perfect for hanging from a necklace.  It's lived in many necklaces over the years since I bought at at a local rock show. Madylyne trivia:  I've always been a mineral collector, and Fluorite is my favorite.


 The clasp in the back is made of a single piece of wire, bent in half, twisted together, with the "loose" ends looped around to form the ring that joins the beaded link next to. The hook goes through the end of the opposite link to close the necklace.  Even though 22mm copper wire is pretty flexible, doubling it and then twisting it makes it nice and sturdy.


Tada.


.

27 August 2014

In Which Vikings Are Still Pretty Dang Cool

My primary [sewing] August project:  a Viking tunic for a Celt/Viking friend.


Butter-yellow linen/rayon blend, with trim in dark green linen, both from my stash.


All of the edge embroidery was done on my sewing machine.  Aside from that fact, the stitching designs themselves are period for Viking decorative stitches and seam stitching treatments.


The hound on the center front, however, I did entirely by hand.  This is the first time I've embroidered knotwork, the first time I've filled an entire motif in with stitching, and also the first time I've hand-embroidered anything I was making for someone else.

nope. 

The original hemline came out a bit...wonky.  I cut it off and added the wide band of green that you see in the first picture, and here: 

these decorative stitches also hold the seam allowances in place on the inside

As the recipient's device is [a whole bunch of stuff I can't remember how to say correctly] over a green and yellow checked field. This ladder stitch, yellow on green, was intended to be a subtle shout-out to that checky field.  


Just as the red satin-stitching around the green trim is sort of a callback to the red bordure around his entire device.  

Now, if you'll excuse me, I have some woodworking to do...


.


12 August 2014

Well, Shit (An Autobiography)

Remember my painstaking experimentation with dyes last week, in an effort to find the perfect blue for my next project?


See, I had this thing where, if I was creating something for someone else, I would work on NOTHING except that project - no fun stuff until the work is done!  Yeah. It always worked out just like you'd imagine - stress stress deadline stress don't wanna stress deadline procrastination stress stress.  It made everything miserable and no fun at all.  So I stopped.  And it's been great - now everything is fun, and I'm usually working on one for someone else and one or two for me at once, and I can switch when I get bored or tired, and there's always something going on.

Except that last night, after I threw my white linen into the final, official, blue dye bath, I got to work on something else while the linen was soaking...and forgot about it...for three hours.  It never got stirred, it stayed in the bath too long, and well...


Yeah.

It's ruined.  I mean, it's *beautiful*...but it's no longer fit for SCA-anything, regardless of the probability that ancient peoples DID actually also fuck up when dyeing things.  I washed it three times after this, and the color(s) faded enough that if I run it through with bleach, it MIGHT actually be fit to try re-dyeing, which I'll attempt this evening.

At the moment, though, I'm pretty angry with myself about it.

.

08 August 2014

Blue Stuff

It's not really a secret that my favorite color is blue, is it?  Didn't think so.  I'm friends with every blue there is, but my favorite is a certain muted tone of light greeny-gray-blue, like this:


(In fact, I have an entire board on Pinterest dedicaeted to blue)

I'm really into Vikings lately, and I have some older garb that has really seen it's day; I've been planning to rebuild one of my old cotehardies into a new Viking hangerok or smokr apron dress.  The fabric is "Emerald" linen from Fabric-Store.com, and I thought I'd pair it with a new under-dress in my favorite blue.  I'm also really into dyeing fabric more and more these days - it's so fun!  I've done colors straight from the bottle; but I recently found Rit's Color Library guides on their website - really handy stuff - and so I thought I'd give custom color-mixing a try.

To wit:


Based on my perusal of Rit's various color mixing charts and guides online, I purchased a bottle of "Evening Blue" and a bottle of "Apple Green", and went to town.  The mixtures are labeled on the photo above.  I did two dye baths, to see the difference between using salt vs. vinegar in the mixture as a fixative;  I normally use both at once, so at the end of the experiment, I mixed them together and gave it a whirl, and then transferred the mixture into a metal bowl just for kicks, to see if there's really that much difference.  (There is. The entire rest of the experiment was done in glass containers).

It's not very scientific, I was just playing around.  None of the colors are exactly what I was looking for; but "C" in the upper left corner is pretty dang close.  This coming weekend I'm planning to cut up the samples and over-dye them with coffee grounds and with tea, to see if I can shade and warm up the tones just a tad, to get the blues exactly where I want them.

In the meantime, I now have the following:

  • some experience in color mixing,
  • a handy-dandy homemade chart of several hues of blue that I like, and
  • The above spread, tucked into this beautiful, art-i-fied journal made for me by my BFF

Sylvan's blog                                    Tiny Relics, Sylvan's Etsy shop


Sylvan makes gorgeous art journals and decorated notebooks, and she made this one for me.  It's graph paper (my favorite!!), and she even made a ruler, scaled to the size of the notebook grid (!!!), that matches the book (!!!!)  How freaking awesome is that?  I use this as my SCA sewing notebook, instead of my...er..."system" of scrabbling down costume notes and people's measurements on random scraps of whatever's handy and then losing them in The Craft Pit. 


.

06 August 2014

ROMA VIDA

Hey, guys! Check it out:

It's me!  Hi! 


I can has Roman!  Our upcoming fall baronial event is Byzantine-themed, and folks are dragging out all the Byz and Roman they can muster.  It was the perfect excuse to make this outfit - which I'd had the fabric for set aside, no kidding, for like two years, and never got around to throwing together.

My friend Simona and I got together last weekend to brainstorm styling and draping.  She saved us both from toga-party snoredom with an ingenious pattern idea that she [edit: learned from a woman who'd learned the method at a King's College (Ansteorra) class taught by Cherie Weed, a local SCA seamstress]. 

The dress is cotton "bubble" gauze, the sash is made from scraps of blue silk (leftover from this cotehardie), and the palla - the black drape over my head and shoulders - is a soft, loosely-woven curtain panel of cotton that was given to me many years ago.

"But wait," you say, "isn't Roman 'garb' just a bunch of big rectangles pinned/sewn together?"   That's exactly what this is...but not in the way that I thought it would be.


This is Simona, and her new teal linen
Roman outfit.  ♫ H-h-h-hiiii, Simona! ♫


At the simplest level, two rectangles of fabric pinned at the shoulders makes a peplos, like this:

(Pinterest, credited to "scaeveryday",
tho I couldn't find a direct link). 

Or a single swath of fabric, wrapped from one side and pinned at the shoulders and down the arms, gets you a chiton, like this:


(Take Back Halloween.  This example
is also sewn down the sides, but it
doesn't have to be)

Simona's pattern, though, goes a little something like this:


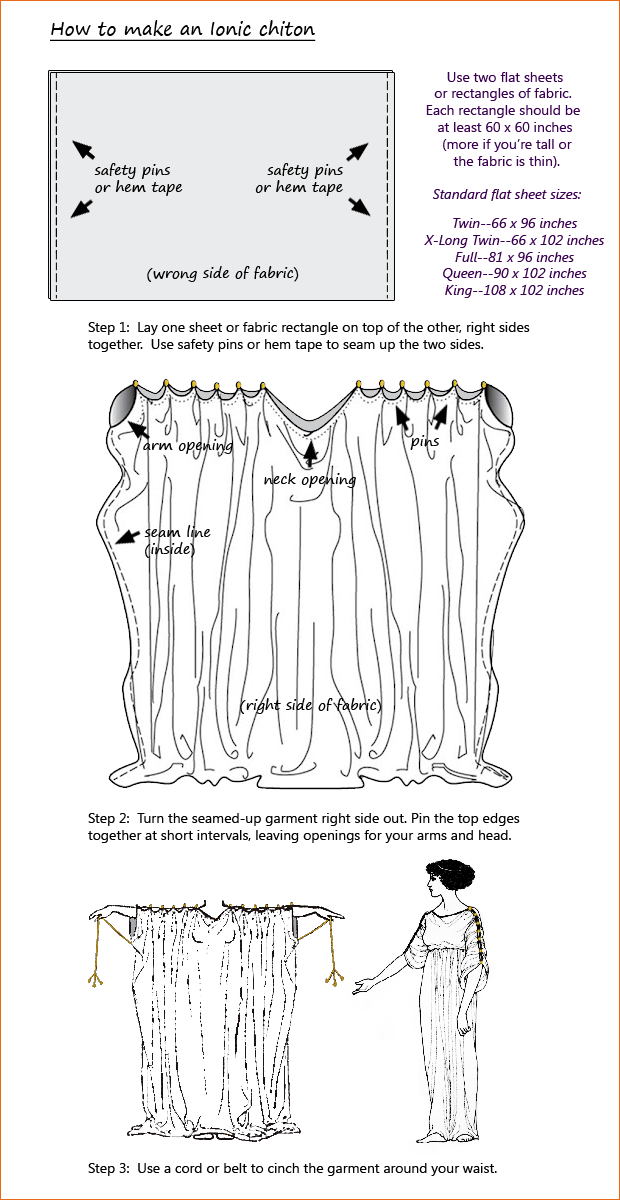
A tube is sewn, with the seams in the front and back of the body, instead of on the sides.  The top front and back are opened to create the V-shaped neckline, and then gathered (about 4-7", depending on how drapey and pleat-y you want the finished garment)/ This part rests on your shoulders, and your arms go through the resulting sleeve holes.

This method gives a really lovely drape across the neckline and bust, and is very form-flattering.  I regret that I don't have any documentation to provide for research purposes;  as I said, Simona learned this in a class - which had resource information, but we don't have access to those materials at this time. (If I DO find any, I'll update here).

The only example of this patterning I could find online was from this picture on Pinterest, but the link doesn't go anywhere, sadly:

(Pinterest)

In this example, the shoulder pieces have been wrapped instead of gathered.  I rather like that look.  It also looks like the seams here might be on the sides, and open at the bottom, and that the front may have simply been slit open (much like you do with this knit dress pattern, of which I've made several, by the way, and they're wonderful to wear!) and then pinned in place.

So there you go.  :)  I'm working on some jewelry at the moment; I'll put up pics as soon as I'm finished.  And find my camera data cable.  0_0


.

07 July 2014

One Night In Bangkok...

Today's post title is the fault of my BFF.*
____________________________________

SO ANYWAY I finished the corset I started in March (here, and here).  Finished it June 29th, actually, but it's taken me until now to locate my camera data cord so I could bring you some finished-product pics:


The finished corset!

Fabric: cotton damask, drapery-weight
Lining: cotton calico
Interlining: 2 layers of lightweight buckram
Boning: stiff boning of bamboo baking skewers; flexible cording of heavy upholstery welting cord

Trim: black linen (over finished edging, not structural, purely decorative)
Lacings: 4-strand braid "viking whipcord" made from cotton crochet thread.
Eyelets: stitched by hand over aluminum backing rings, with DMC embroidery floss.


A note about the fit: as is evident in the first picture, the front piece is about 2" longer than the side pieces.  It's actually not; I had it laced incorrectly.  I unlaced them and moved the side pieces down, like in the diagram here - which does NOT look like it'll fit nicely when laced, but which actually fits perfectly when on my body.

The things you learn.


Things I will do differently next time:

 This is my very first corset...er...discounting the renfest corset that I tore down in order to start work on drafting the pattern for this one.  I LOVE the way it fits, however, for the next one:

  • the front bustline needs to be just a skoch lower, as it peeks up above every dress I put over it
  • The front waistline is too long for sitting comfortably for very long time periods, at least, with the bamboo boning in place.  I either need to shorten the length of the boning in the front, so that it doesn't go all the way down, or I just need a shorter corset in general - or to go the opposite way and make it long enough to bypass the tummy pooch that this corset stabs when I sit. 
  • I will probably leave a small pocket in the front for a busk (and for my e-cig, hehe)
  • the angle of the top pieces of the back result in a bit of a point at the center back, which I think I'll remove on the next try
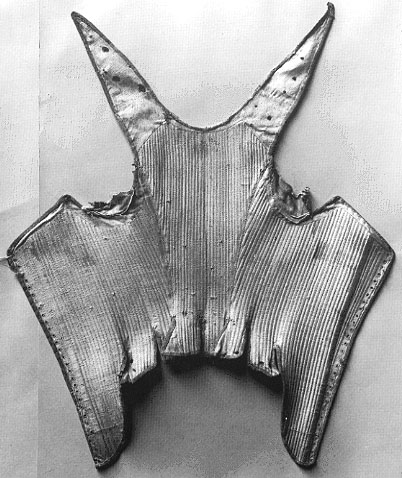
  • The straps are about 1" longer than I'd like, now that I've worn it about a bit;  and the origin point for the straps, on the back pieces, needs to be moved inward towards the center about 1.5" so that they sit correctly on the back of my shoulders  (i.e. I now understand why the famed "effigy corset" is shaped the way it is (Mine is NOT supposed to be an effigy knockoff, nor even remotely contemporary to that one. It's far earlier, and no, for the record, not 100% period in design. This is just an exercise in corsetry for me, my first serious foray). 
  • The pieces (1 front, 2 sides, 2 backs) were designed to allow for a LOT of size adjustment, since I've been losing weight and gaining muscle like crazy for a while now.  I knew I'd have to take this in, and change some of the angles.  Turns out, enough of that has already happened since I drafted the pattern and began construction in March, that the corset is already laced all the way closed, and if I lose ANY more weight, will already be too small!!  I'm mulling over ways to keep that from happening again on my next corset, without resorting to just making it too small to begin with and hoping for the best. 
  • I will make SURE, before I start sewing eyelets, that I have enough of the same color floss to complete that phase of the project!  This corset's eyelets are four different blues, and one green.  :/ 


You may recall...


The brown linen Italian dress I made for myself last year.

This is what it looks like without a corset.  (I.e. a stack of brown pillows, and shoulders that fall off).


Sooooo much nicer.  


One final note:  yes, the chemise here is my Italian camicia,  which I adore.  I DO plan on making a second one, with longer sleeves and more frill; as well as a second, actually-period corset, now that this one is done (I'll likely sell this one), and another couple of late-15th-C Italian kirtles to be worn with various other [new] sleeves.

In the meantime, though, I have a to-do pile stack list as long as my arm, and a couple of projects for other folks that I'm finishing up.  More on that soon!


____________________________________


* To wit:


.

30 June 2014

Let's Talk About Boobs

Most women I know in the SCA wear modern bras under their clothing, either because of a lack of period options or because it's simply easier to stick with what you know.  A discussion on Facebook about getting a proper bra fitting in a store prompted the following explanation from me, and I thought it might be useful to share here, for my seamstress readers.


______________________________________________

"...you can do it yourself easily. Measure underneath your breasts around your ribcage where the band goes - better yet, have someone else do it for you so that you can mind your posture (because if you're crunching over to see the tape, you're not getting an accurate measurement). Then measure around your breasts, at the widest part (the widest part, not the nipple itself). 

The difference between the band measurement and the breast measurement is your cup size. Every two inches of difference is a cup size. For instance, my band is 40" (actually forty-and-a-half, but round down for give in the elastic of the bra); and my bust measurement is 45". That makes me between a D (which would be 44") and a DD (46"). In truth, one breast is a D and one is a DD.  (Also keeping in mind that if you're like me, and your cup size doesn't change when you lose/gain weight - as your band size changes, your cup size will as well.  I wear a larger cup size when I'm thinner, for example, because the difference between my band and bust measurements increases). 

That's where a professional tailor or lingerie fitter comes in - they can eyeball small anatomical differences and tell you whether (still using my measurements as an example) a D or a DD would be better, and when to go up/down a cup size or when to make adjustments in the band size itself. But if you can measure yourself, or have a friend do it, you can experiment and see what's comfy for you. I wore a C cup and a band size that was FAR too large for me for many, many years before I learned to do this; the reason we HAVE bra fitters is that most women do the same. When in doubt, try on a larger cup and a smaller band than you normally wear. 

This segment brought to you by the letter N for nerd." 
______________________________________________


That said...

  1. It's not an exact formula, and 
  2. It's not going to work for every single person, since every person's body is a bit different. 

The formula, however, is also easily adaptable for very-fitted SCA garments like cotehardies and "period brassieres", for example.  The more information you know about how to fit your breasts, the more information you'll have about fitting them into a garment, whatever your underwear of choice. 

Another thing many women tend to overlook, both with bra fitting and with costumery, is that your "breast" covers more area than just what you think of as your "boob."  

original diagram from THIS ARTICLE at NursingCrib.com 
 

Take a look at the purple lines I've added to the above diagram.  For fitting purposes, you need to know that your breast, in a bra or a very tailored garment, begins at the side line of your body directly underneath your armpit; and also goes up to the point under your collarbone between your shoulder and the hollow of your neck.  (This is especially true for larger-breasted women, since both modern bras and supportive SCA garments push the breasts upward towards that point).  

* Also, keep in mind that if your breasts don't happen to be the ones that you grew yourself, sometimes the side-line will be moved forward, or be entirely absent, depending upon how your current model was installed by your surgeon.

Just as when fitting the cup size for a modern bra and taking into account the underarm/side area so that the bra cups support the whole breast and not just the "boob" on the front of your body; when fitting a supportive cotehardie or other supportive garment, you must take into account, in your alterations and pattern construction, the fact that your body pieces will need to support that area as well as everything else.  This is why the line of tension in a self-supporting garment goes from that side seam to the front center of the garment, like this: 

Here, the blue line is the tension line.  The red circle is the placement of the
lifted and supported breast in such a garment. 

And DO keep in mind that ALL of this is going to change from individual body to individual body, and your mileage may vary.  In general, though, I hope this information helps you in your fittings. 


.