Showing posts with label corsets. Show all posts

13 April 2023

Regency: Lavender Striped Drop-Front Dress


I LOVE striped Regency dresses. I keep thinking about making one, but I had no fabric to use …but wait, I thought - don’t I have a lavender striped cotton duvet cover in storage not being used for anything? 


I’d seen people use duvet covers and sheets for regency dresses before (I've even made a dress out of a pair of curtains myself); but I was worried it wouldn’t be enough fabric, but it turned out, the duvet cover was exactly enough for what I needed. (And to tell you how old this thing is, I got it at Linens N Things - remember them? It’s old but it’s in great shape).  


I used my Reconstructing History pattern for this dress, because I wanted the flat front and bib to show off the stripes. I was leery about using the pattern again, as the first time through was a nightmare - but when I made it before, I knew exactly squat about the construction and fitting of Regency dresses, and now I have more experience and a much better idea of what I'm doing now, and this went together really easily. 


I drafted new sleeves for the dress, since I wanted a straight long sleeve, and the pattern only had a short sleeve or a double sleeve option. (The double sleeves are neat, but I have broad, square shoulders, and puffy shoulders make me look like a linebacker, so I wanted a more streamlined silhouette there). I measured all the sleeve pieces from the pattern and then drew out my own sleeves based on that, adjusting the fit a bit for slightly-larger-than-usual upper arms. I also added a thin wrist band with a hook on it to close the sleeve around the wrist: 


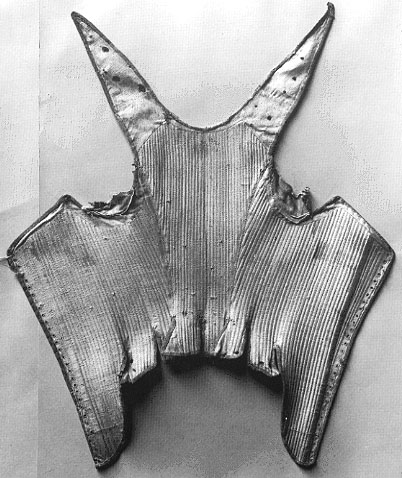
I started this project and got about halfway through it when I realized I was going to have to make a new corset to go with it.  You can read about that in my previous post here.  


*


But wait, you say, isn't lavender/purple a mourning color?  Yes and no. From what I've read, in full mourning (the period right after a person's death) one would wear black or as near to it as was feasible (gray, dark gray, black accessories if you didn't have/couldn't afford a new black dress, etc.).  In half-mourning (the later half of the mourning period, designed to transition you away from all-black and back into more cheerful colors), softer, muted colors like gray and lavender and purple became acceptable.  You could always wear purple any time you wanted, of course - it wasn't strictly reserved for half-mourning.  The folks in the Regency weren't nearly as strict about these things as the Victorians were.  

That said, if I wanted this dress to be a half-mourning outfit, I could always accessorize it with my black crocheted mitts and a sheer black shawl: 


I love my new dress, and I plan to wear it this weekend: the local JASNA is having their annual Box Hill Picnic near Austin, and so I’m grabbing a couple of Regency-friendly friends and we’re headed down!  I’ve never been to a JASNA or Regency-themed event before - I did check to make sure costumes are allowed, and was told that yes, some people wear Regency attire to the picnic. Now I just have to figure out what to bring to eat for lunch. And what to do with my hair! And - where the heck are my white gloves?? 

22 November 2020

...And Now For Something Completely Different

So, here's something a bit out of the ordinary:  I made myself a Regency-era (Empire) gown.  I had six yards of sage green crushed Dupioni silk on hand that I had had for years, and  I was saving it for "something special", but that something never came around - what was I saving it for then?  I decided to have fun with it. 

And so I give you:


At first I thought I'd get a Simplicity pattern and just start sewing; but I had too many questions about the fashions themselves - first and foremost, was that Simplicity pattern even accurate?  A LOT of reading and study happened next.  Long story short, I finally ended up ordering the Morning Dress pattern from Reconstructing History, and got to work. 


I adore these buttons!


The pattern went together pretty easily once I figured out some snags I had along the way.   But once I got it sorted the dress came together just like it was supposed to.  I made three mock-ups of the bodice, and two finished bodices,  to get the fit right.  

I also made a Regency-style chemise, and a pair of stays to wear beneath the dress.  The fashion in the early-mid Regency period was to let it all hang out - no corset, no stays, nothing.  Of course, larger women (me) and larger-busted women (me again) did opt to wear stays to keep everything in place.  The chemise is made of handkerchief-weight white cotton;  the stays are made of cotton calico with bias tape binding and hand-stitched lacing eyelets.  


Credit where credit is due: 

A dear friend gave me a big gift card for my birthday this year, which I used to purchase a new cutting table (hooray, no more cutting out on the floor!) and all the notions and supplies I needed for this dress.  I had the fabric already, but without that birthday present this outfit wouldn't have happened.  Thanks, Friend!  


What's Next? 

Sadly, I don't have anywhere to wear this outfit - I'm not involved with JASNA or any local Regency groups (there aren't any local Regency groups), and Halloween didn't happen this year.  This was purely an exercise in branching out and learning something new.  It'll hang in the closet forever, I suppose.  Even if it does, I plan to keep learning and keep adding to the ensemble - it needs a Spencer jacket and a hat!  Those are "one of these days" projects, I think. 

For now, though, my next project is going to be a [modern] winter coat for me.  I've always wanted to make one, and I've found the perfect pattern for it.  It'll take me a while to collect all the components I'll need for the coat, though, so I probably won't have the blog post about it for you for a couple of months.  In the meantime, there are always masks to make.   


07 July 2014

One Night In Bangkok...

Today's post title is the fault of my BFF.*
____________________________________

SO ANYWAY I finished the corset I started in March (here, and here).  Finished it June 29th, actually, but it's taken me until now to locate my camera data cord so I could bring you some finished-product pics:


The finished corset!

Fabric: cotton damask, drapery-weight
Lining: cotton calico
Interlining: 2 layers of lightweight buckram
Boning: stiff boning of bamboo baking skewers; flexible cording of heavy upholstery welting cord

Trim: black linen (over finished edging, not structural, purely decorative)
Lacings: 4-strand braid "viking whipcord" made from cotton crochet thread.
Eyelets: stitched by hand over aluminum backing rings, with DMC embroidery floss.


A note about the fit: as is evident in the first picture, the front piece is about 2" longer than the side pieces.  It's actually not; I had it laced incorrectly.  I unlaced them and moved the side pieces down, like in the diagram here - which does NOT look like it'll fit nicely when laced, but which actually fits perfectly when on my body.

The things you learn.


Things I will do differently next time:

 This is my very first corset...er...discounting the renfest corset that I tore down in order to start work on drafting the pattern for this one.  I LOVE the way it fits, however, for the next one:

  • the front bustline needs to be just a skoch lower, as it peeks up above every dress I put over it
  • The front waistline is too long for sitting comfortably for very long time periods, at least, with the bamboo boning in place.  I either need to shorten the length of the boning in the front, so that it doesn't go all the way down, or I just need a shorter corset in general - or to go the opposite way and make it long enough to bypass the tummy pooch that this corset stabs when I sit. 
  • I will probably leave a small pocket in the front for a busk (and for my e-cig, hehe)
  • the angle of the top pieces of the back result in a bit of a point at the center back, which I think I'll remove on the next try
  • The straps are about 1" longer than I'd like, now that I've worn it about a bit;  and the origin point for the straps, on the back pieces, needs to be moved inward towards the center about 1.5" so that they sit correctly on the back of my shoulders  (i.e. I now understand why the famed "effigy corset" is shaped the way it is (Mine is NOT supposed to be an effigy knockoff, nor even remotely contemporary to that one. It's far earlier, and no, for the record, not 100% period in design. This is just an exercise in corsetry for me, my first serious foray). 
  • The pieces (1 front, 2 sides, 2 backs) were designed to allow for a LOT of size adjustment, since I've been losing weight and gaining muscle like crazy for a while now.  I knew I'd have to take this in, and change some of the angles.  Turns out, enough of that has already happened since I drafted the pattern and began construction in March, that the corset is already laced all the way closed, and if I lose ANY more weight, will already be too small!!  I'm mulling over ways to keep that from happening again on my next corset, without resorting to just making it too small to begin with and hoping for the best. 
  • I will make SURE, before I start sewing eyelets, that I have enough of the same color floss to complete that phase of the project!  This corset's eyelets are four different blues, and one green.  :/ 


You may recall...


The brown linen Italian dress I made for myself last year.

This is what it looks like without a corset.  (I.e. a stack of brown pillows, and shoulders that fall off).


Sooooo much nicer.  


One final note:  yes, the chemise here is my Italian camicia,  which I adore.  I DO plan on making a second one, with longer sleeves and more frill; as well as a second, actually-period corset, now that this one is done (I'll likely sell this one), and another couple of late-15th-C Italian kirtles to be worn with various other [new] sleeves.

In the meantime, though, I have a to-do pile stack list as long as my arm, and a couple of projects for other folks that I'm finishing up.  More on that soon!


____________________________________


* To wit:


.

25 March 2014

March Sewing Challenge: Part 2

Work on the blue corset proceeds apace:


Post #1:

  • pattern drafted from existing Renfest corset:  re-sized, no. of pieces changed, back/sides re-shaped for style
  • pattern traced onto paper for future use
  • fabric cut out:  outer shell, inner lining, two layers of interlining

As of now: 
  • interlining basted in place
  • lining and outer shell sewn together, including straps
  • Boning and cording channels sew in front/back/sides
  • Cording inserted (sturdy upholstery welting cord, cotton)
  • Boning inserted (bamboo kitchen skewers (it was what I had on hand)

I've also got most of the edge trim attached, but not finished, all the way around the pieces - but I've changed my mind about the color, and will be removing the trim and replacing it tonight.  After that, all that's left is the finishing that I have to do by hand - some stitching, some eyelet holes, stuff like that.  

Next set of pics should be a finished corset!  :D 


12 March 2014

March Sewing Challenge: Procrastination Edition

Sometime last year, I decided I wanted a Tudoriffic corset*.   Several months ago - before I re-did the sewing room - I went so far as to try on my old Renfest corset and mark up the pieces so that I could transpose it into something more or less period.

oops.  bit small these days. 
For a long time, the almost-pattern that I made that day sat in carefully organized storage a pile of other crap, awaiting the day when The Perfect Fabric might come along.  It did, eventually.  It was exactly what I'd been waiting for, and I guess that day I had CrazyFlakez for breakfast or something, because it got made into the top half of a sideless surcote instead:


However...


DUN DUN DUNNNN......  (to be continued)...


.

09 August 2013

Progress!

A

Remember the little painted black box?  I'm doing a much larger version - a 24" six-panel wooden chest.  The box itself is nearly finished, and painted; now I'm working on the box top:

(part of the upper right corner)  


B

I've also decided I need a Tudor corset.  I don't have a pattern, and I don't feel like drafting one from scratch, so I'm drafting one from an old renfest corset that still [mostly] fits me.  The first part was getting it on and laced up, and then marked with a chalk pencil where I'll be making shape and sizing adjustments:


C

And just for fun (because I'm still in the process of re-organizing my sewing and craft/art rooms, and because I had to re-organize my jewelry supplies into better containers and had the beads out anyway), I made a little necklace to wear with...whatever!  To me it says "rubies and pomegranate arils", even though it's just glass and tiny tumbled garnets.


More soon.

.